
After macOS Mojave 10.14 macOS Catalina 10.15 is the major successful release of Apple Inc. macOS Catalina 10.15 is the newest version of the operating system for Mac users. Besides that macOS, Catalina is the sixteenth major release of the macOS Apple desktop operating system for Macintosh computers. It was rolled out by Apple Inc at the “WWDC” Worldwide Developer Conference on June 3, 2019 in beta mode. But it is a public version released on October 7, 2019. Ever macOS Catalina is the biggest operating system than the previous product of Apple with incredible features changes. It has lots of changes to its features and the internal look of the operating system. In WWDC19 macOS Catalina was introduced and clarified with all those features to people. And Apple gives improvements to the security performance, or another feature is that you can connect your Mac computer to your iPad.
macOS Catalina 10.15 is the first operating system of Apple that support only 64-Bit of Applications, and the first operating system that allows you to connect your iPad to your MacBook. The app named as SideCar on macOS Catalina, SideCar is the best opportunity that allows you to edit your photo on your computer screen using your iPad photo editor. Alongside, there is no more iTunes, Apple replaced iTunes with Apple Music. Now you can use Apple Music for listening to your favorite songs.
What is SideCar? it designed to connect your iPad as a secondary display on your Mac laptop. You can turn this feature at any time when you want to connect your iPad, just moving your mouse course to SideCar option. Before connecting your iPad you must have the latest version of iOS on your iPad, then to activate it over ahead to “System Preferences”, or simply access it from the AirPlay interface on Mac. Moreover, their lots of changes on the “Find My” app, adding new features to Photo, Safari, Notes, Mail, Reminders, Quicktime Player, Home, HomeKit Secure Video, Apple Arcade, ScreenTime.
The purpose of this post is to install macOS Catalina 10.15 on VirtualBox on Windows PC. We are thankful for developers that provide as the facilities of the Virtualization platform. Virtualization can be accessible on Mac, and Intel or even AMD processors. You can use a Virtual machine to run several guest operating systems on the computer. Hurry up! if you are interested and have the enthusiasm to install macOS Catalina 10.15 on VirtualBox on Windows PC. This virtual machine allows you to install several OS on it at the same time. Also, VirtualBox is the best and open-source virtual machine, you can get it from its official website that called VirtualBox.org.
If you have a MacBook computer, then let’s know this that macOS Catalina 10.15 OS is compatible with the following Mac’s computers.
- MacBook (2015 or newer)
- MacBook Air (2012 or newer)
- MacBook Pro (2012 or newer)
- Mac mini (2012 or newer)
- iMac (2012 or newer)
- iMac Pro (2017 or newer)
- Mac Pro (2013 or newer)
Install macOS Catalina 10.15 on VirtualBox on Windows PC
The installation process of macOS Catalina 10.15 on VirtualBox on Windows PC is pretty easy. But it needs some efforts to handle it, first, you need to have a better computer that should run a guest operating system, second, you need to download macOS Catalina 10.15 VMDK, third you have to download VirtualBox, create a virtual machine for macOS Catalina on VirtualBox, last have a clean installation of macOS Catalina.
1. Create macOS Catalina VMDK file
There is the best method that you can create macOS Catalina 10.15 VMDK & ISO image by yourself. Navigate to Mac App Store, after that, download it from there. It’s difficult to have a Mac computer but you can use a virtual machine. No matter if you are using the macOS Mojave or macOS High Sierra on virtual machine. Or you can borrow a Mac computer from your friends. The method is of creating macOS Catalina ISO or VMDK is easy. When the macOS Catalina downloaded from App Store, move it to the Application folder. For converting the macOS Catalina.app to VMDK or ISO you have to use the “Terminal” to convert it. OK open up the “Terminal” app.
 Once the terminal opened apply the following code for creating the VMDK and ISO file.
# Mount it to your macOS
hdiutil attach /tmp/Catalina.dmg -noverify -mountpoint /Volumes/Catalina
# Create macOS Catalina Installer
sudo /Applications/Install\ macOS\ Catalina.app/Contents/Resources/createinstallmedia --volume /Volumes/Catalina --nointeraction# Unmount Catalina Disk
hdiutil detach /volumes/Install\ macOS\ Catalina# Convert the dmg file to a iso file
hdiutil convert /tmp/Catalina.dmg -format UDTO -o ~/Desktop/Catalina.cdr# Rename and Move to Desktop
mv ~/Desktop/Catalina.cdr ~/Desktop/Catalina.isoDownload macOS Catalina 10.15 VMDK by WikiKeep
[penci_button link=”https://wikikeep.com/download-macos-catalina-10-15-5-vmdk-vmware-virtualbox-images/” icon=”” icon_position=”left” background=”Red” hover_bgcolor=”Green”]Download Now[/penci_button]
2. Download and Install VirtualBox on Windows
Once the macOS Catalina VMDK or ISO file created over ahead and download install VirtualBox. Because the macOS Catalina 10.15 VMDK “Virtual Machine Disk Image” is ready to run it on Windows PC.
- Navigate to VirtualBox.org’s official site and download the latest version of it for Windows Host.
- When its setup downloaded double-click to open, on the first window click next.
- Again to proceed with the installation click Yes.
- Now the setup will get ready to install.
- Oracle VirtualBox is trusted with Windows, so click Install.
Beside the VirtualBox, you have to download the “Extension Pack” of it. An extension pack is a helper tool that brings features of VirtualBox. Somehow, while installing macOS we are getting stuck on Mouse & Keyboard so the Extension Pack will help to refuse that stuck.
- Below the download link of VirtualBox you can find out the Extension Pack, download it.
- Once it download install it with VirtualBox.
3. Create a New Virtual Machine
Now everything is in your hand, you have downloaded and installed VirtualBox with its Extension Pack. Or you have the full version of the macOS Catalina VMDK file. And now its time to create a new virtual machine for it. Creating a new virtual machine is pretty easy, over ahead to VirtualBox and open it. Once the VirtualBox opened on the main wizard click on “New”.
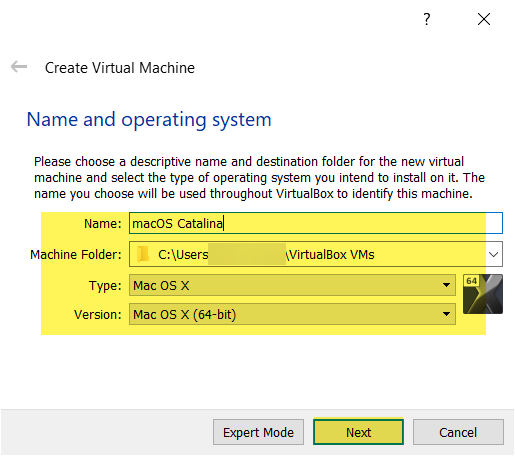
 Select the name for the virtual machine recommend is “macOS Catalina”. Specify the Virtual machine folder, Type “Mac OS X”, Version “Mac OS X (64-Bit), then click Next.
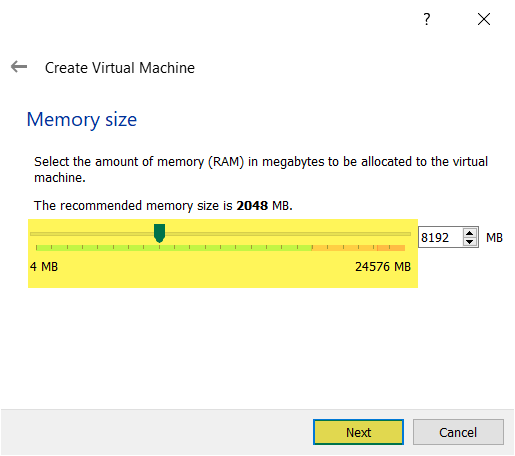
 In here increase the amount of memory size, the recommended size is 2GB but you can increase it more than that. More Memory can bring better speed performance to the virtual machine.
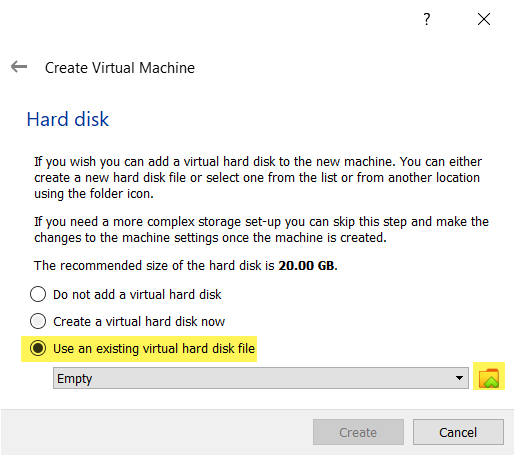
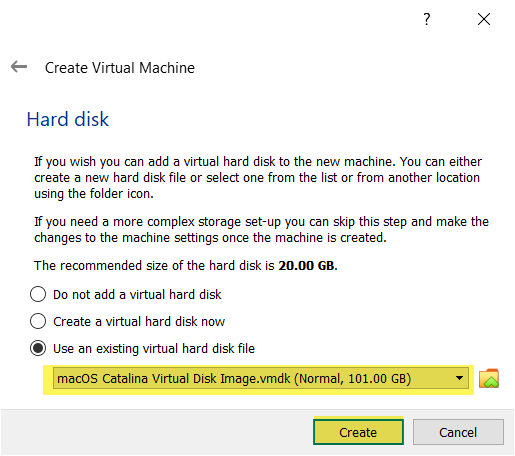
 To insert the VMDK file to the virtual machine, click the third option “Use an existing virtual hard disk file” and click on the “Yellow” folder icon.
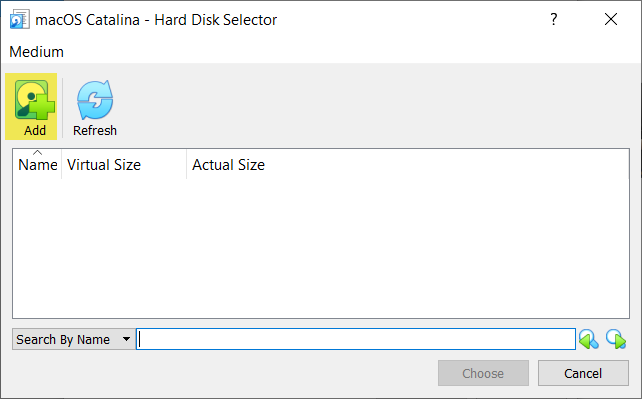
 When this window prompt-up click on the Add (+) button.
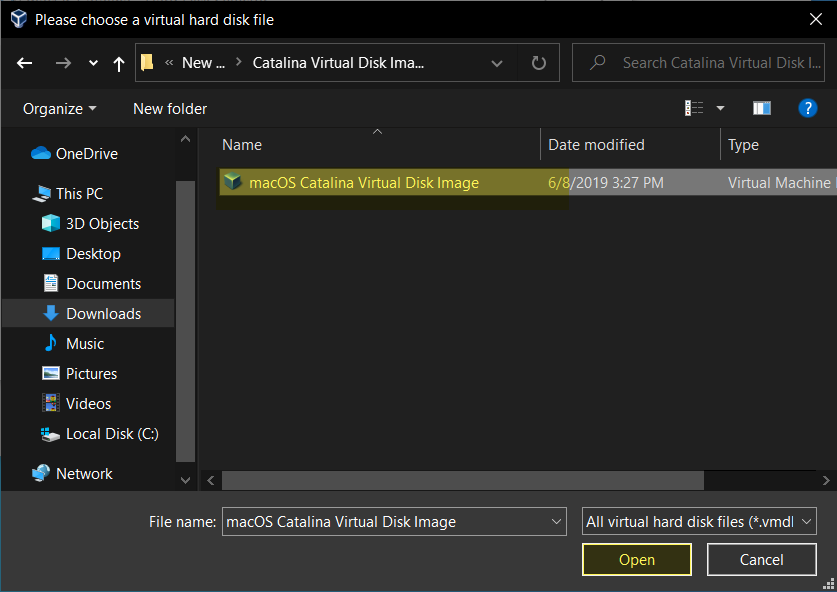
 Select the macOS Catalina VMDK where you stored it then click Open.
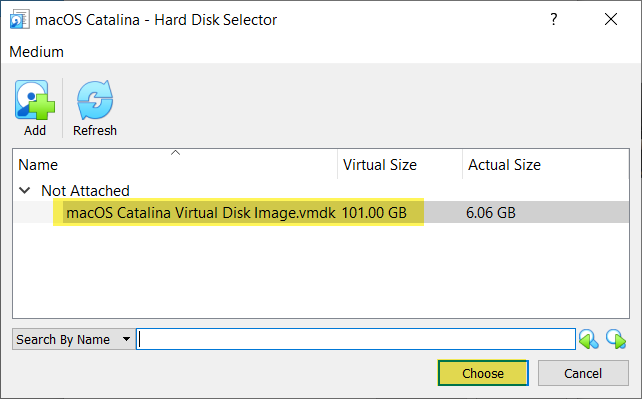
 Be sure that macOS Catalina inserted, and click Choose option.
 When the macOS Catalina 10.15 VMDK inserted to Virtual machine, click Create to create the Virtual Machine.
4. Edit Virtual Machine Settings
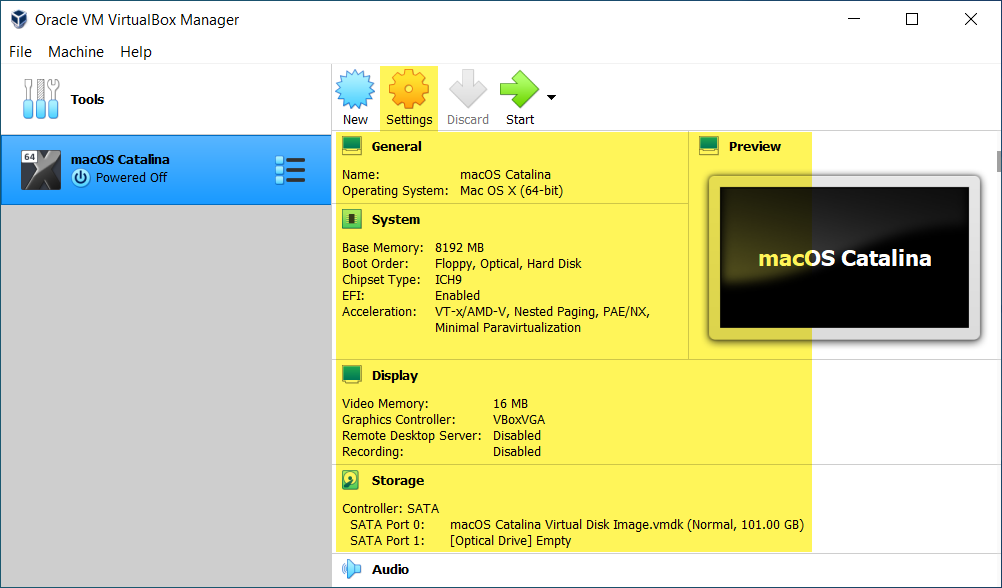
Once the virtual machine created for macOS Catalina 10.15. Then for better speed & Performance you have to edit some BIOS settings, to do that, select the created virtual machine, and click “Settings”.
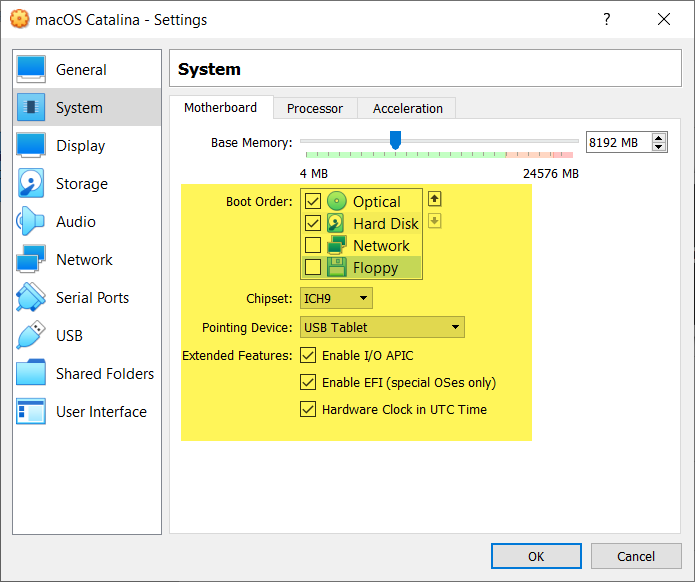
 When the virtual machine settings window prompt-up, select the “System” tab from left-handed. Uncheck the “Floppy disk”.
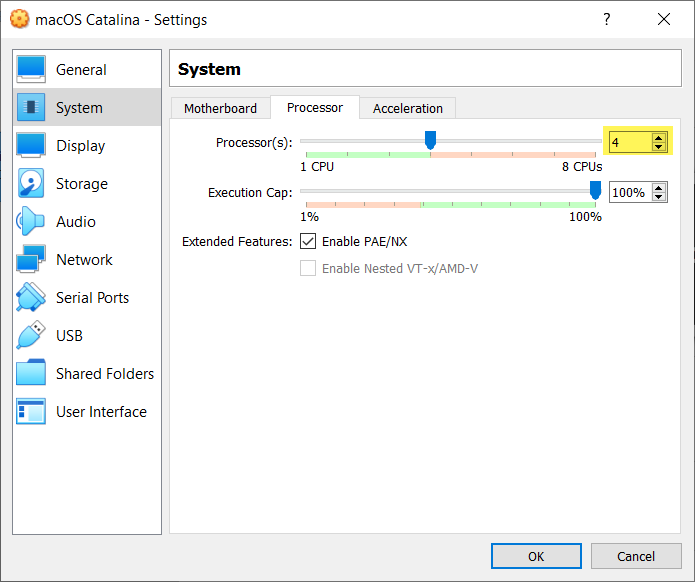
 Select the “Processor” tab and increase the number of “Processor” up to 4.
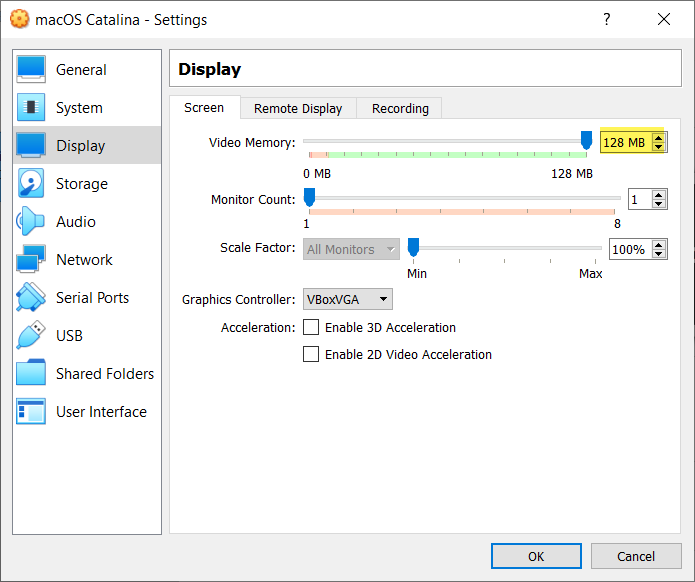
 Below down of system tab select the “Display” tab, then increase the “Video Memory” up to 128MB.
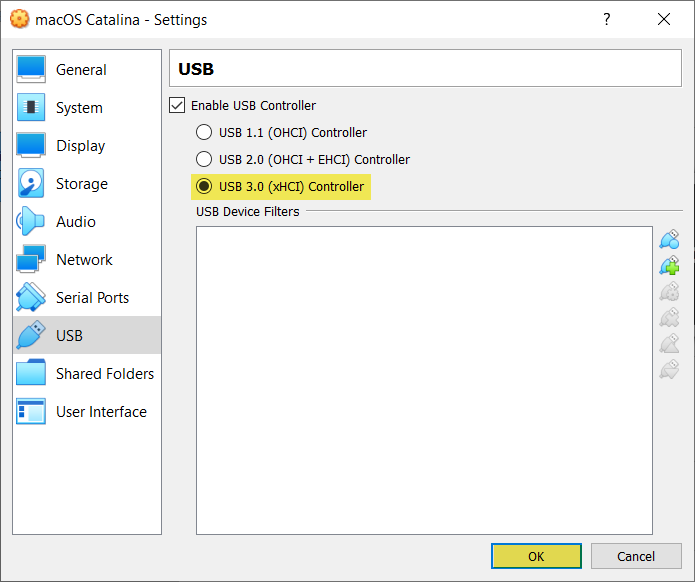
 Now select the “USB” tab, then “Enable the USB Controller” and select the “USB 3.0 (xHCI), Controller. When every setting cleared click “OK” to save changes.
5. Insert the Commands
When you have created a Virtual machine for macOS Catalina 10.15 on VirtualBox, and edited the BIOS settings. Therefore, you need to add some commands for the configuration of it. The commands are a part of VirtualBox that allows you to install the macOS operating system on it. Without these commands you won’t be able to install macOS Catalina on VirtualBox.
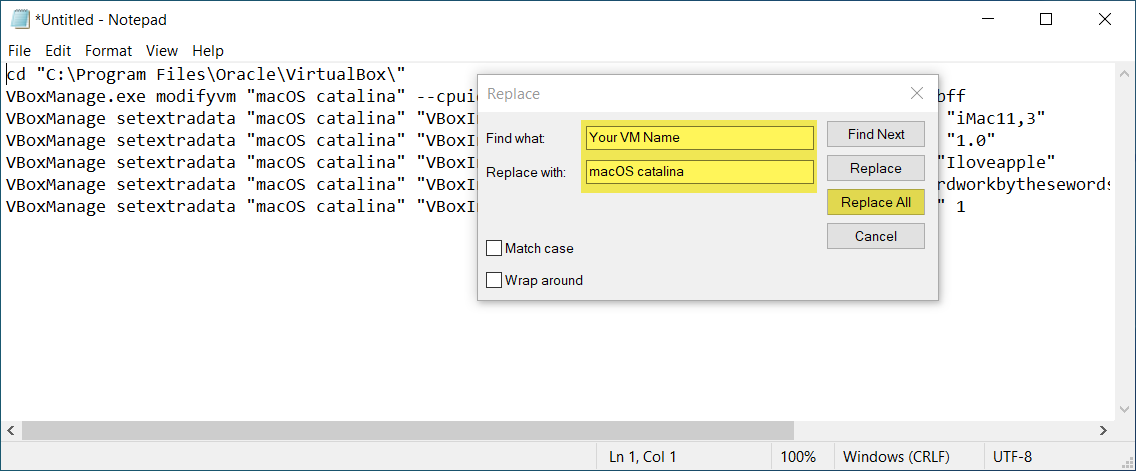
Copy and paste the below commands into Notepad or Wordpad, further you need to edit the VM Name with the name of created virtual machine.
cd "C:\Program Files\Oracle\VirtualBox\"
VBoxManage.exe modifyvm "Your VM Name" --cpuidset 00000001 000106e5 00100800 0098e3fd bfebfbff
VBoxManage setextradata "Your VM Name" "VBoxInternal/Devices/efi/0/Config/DmiSystemProduct" "iMac11,3"
VBoxManage setextradata "Your VM Name" "VBoxInternal/Devices/efi/0/Config/DmiSystemVersion" "1.0"
VBoxManage setextradata "Your VM Name" "VBoxInternal/Devices/efi/0/Config/DmiBoardProduct" "Iloveapple"
VBoxManage setextradata "Your VM Name" "VBoxInternal/Devices/smc/0/Config/DeviceKey" "ourhardworkbythesewordsguardedpleasedontsteal(c)AppleComputerInc"
VBoxManage setextradata "Your VM Name" "VBoxInternal/Devices/smc/0/Config/GetKeyFromRealSMC" 1
Now open the code in notepad window, you will see there “Your VM Name”, you have to replace that with the name of macOS Catalina virtual machine. When you replaced the name press Ctrl+S to save changes.
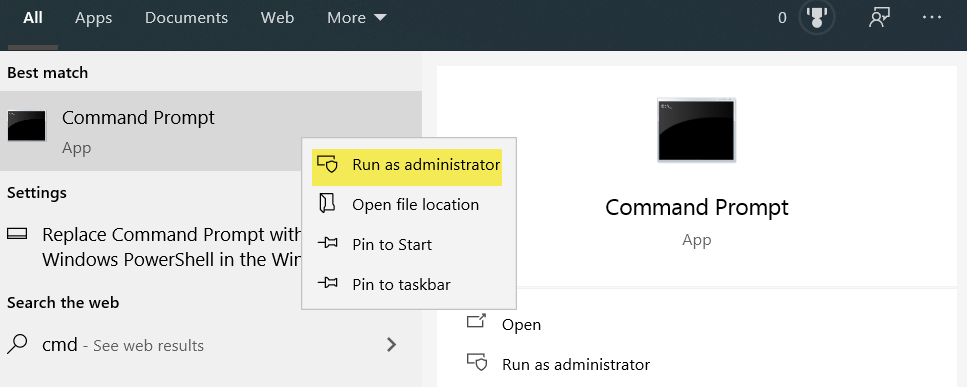
 Navigate to Windows start menu type there “CMD”, once it appeared right-click and “Run As Administrator”.
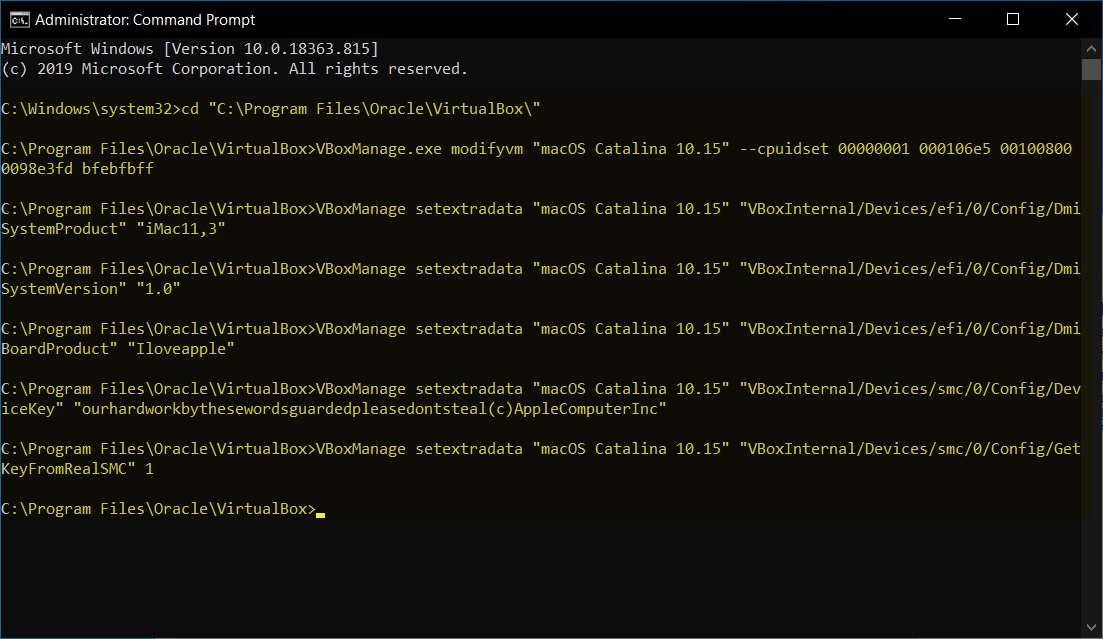
 While the CMD prompt-up, then copy the first line of commands and paste into “CMD” and press enter. Then select all the rest of the commands and paste into “CMD” and press enter, after that, close the CMD.
Note: Before going to apply the commands into “CMD” be sure that you have closed the VirtualBox.
6. Install macOS Catalina 10.15 on VirtualBox on Windows PC
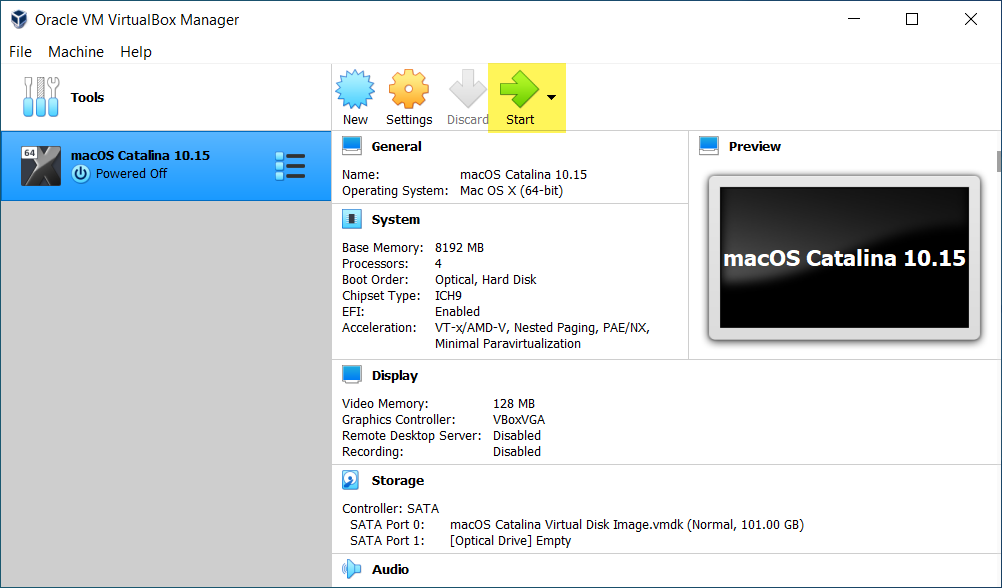
Successfully everything is ready now you can have a clean installation of macOS Catalina 10.15 on VirtualBox on Windows PC. Therefore, Navigate to the Windows start menu find out the VirtualBox and open it. When the VirtualBox opened select the created virtual machine of macOS Catalina 10.15 and click the “Start” button.
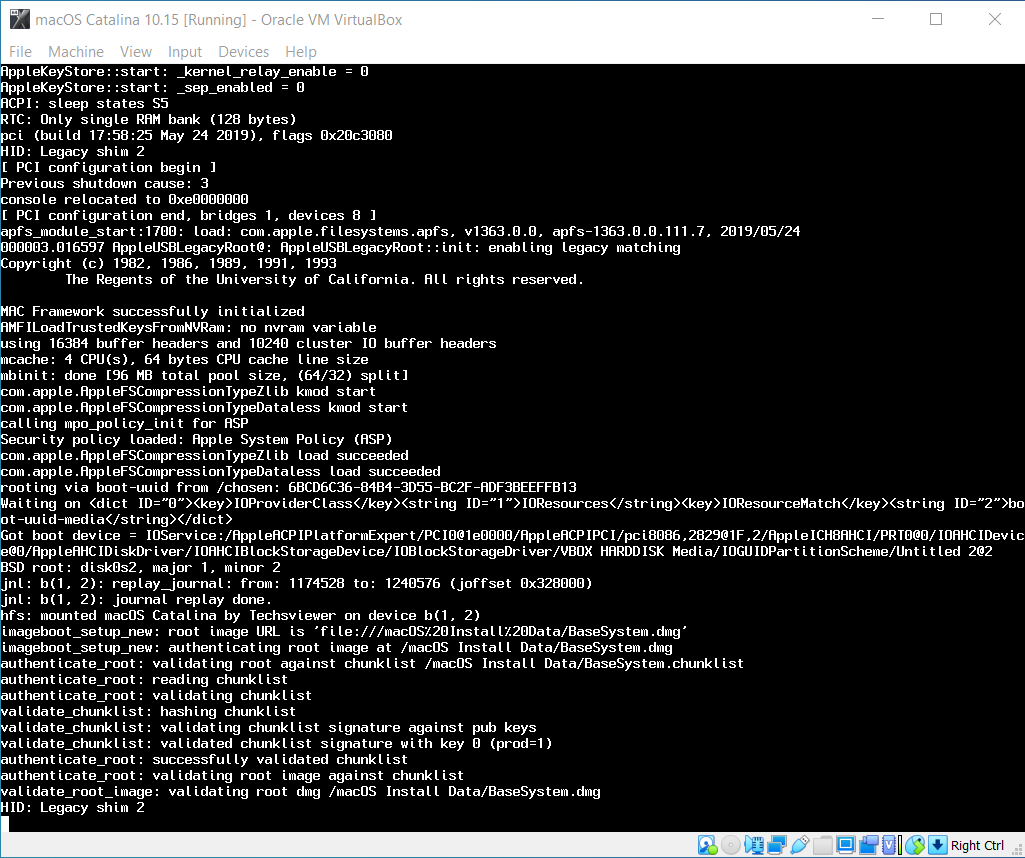
 Wait for this black window full of codes, until it should go-ahead and boot to macOS Catalina 10.15.
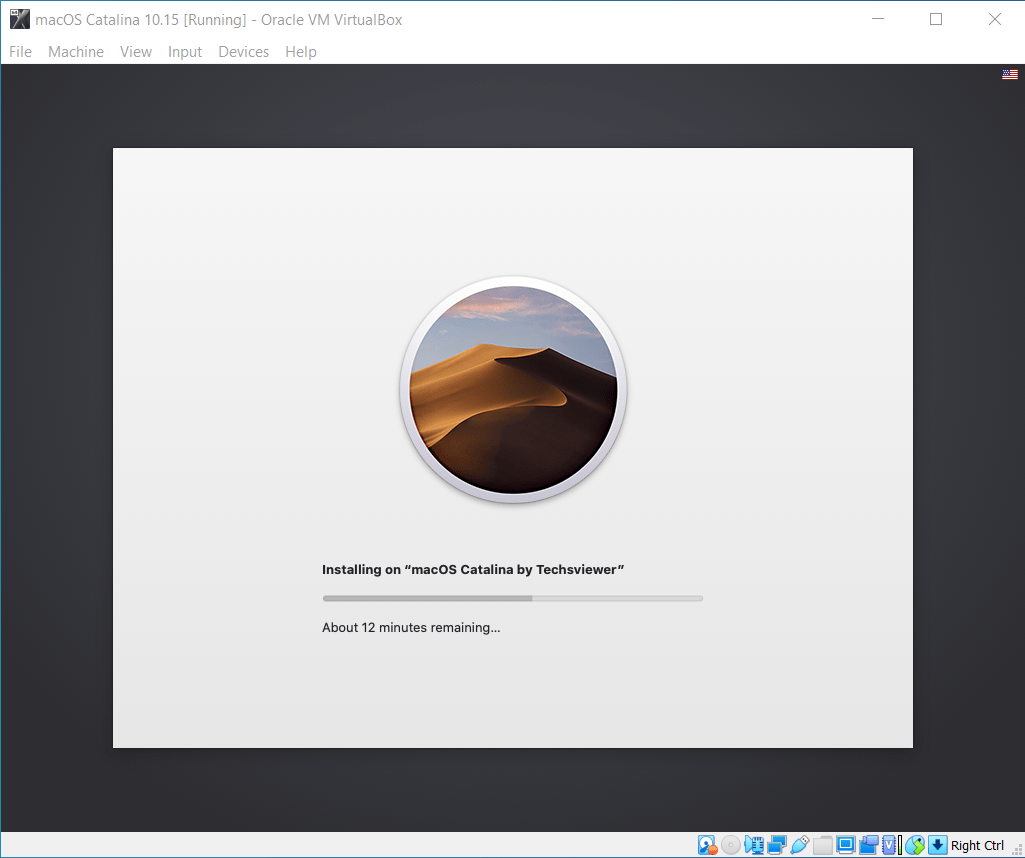
 Again wait for Apple Logo to go-ahead, after that, the macOS Catalina 10.15 installation process will take some time. Wait for it to install completely, when the installation completed automatically it will restart.
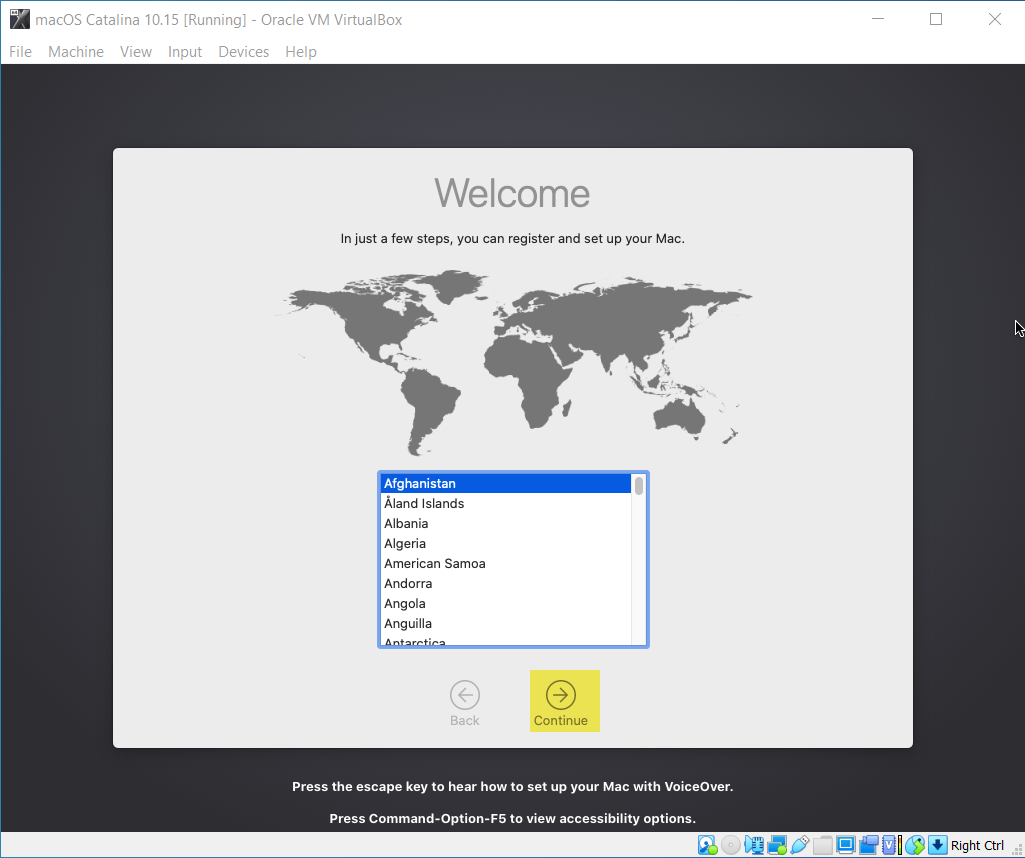
 When coming back to macOS Catalina installation, select your country where you live and click continue.
- Have full review about Data & Privacy of macOS Catalina 10.15 and click continue.
- Select the third option “Don’t transfer any information right now” and click continue.
- If you have an Apple ID enter it, if not then click on “Sign Up Later” and click Skip.
- Agree with the terms and conditions of macOS Catalina 10.15.
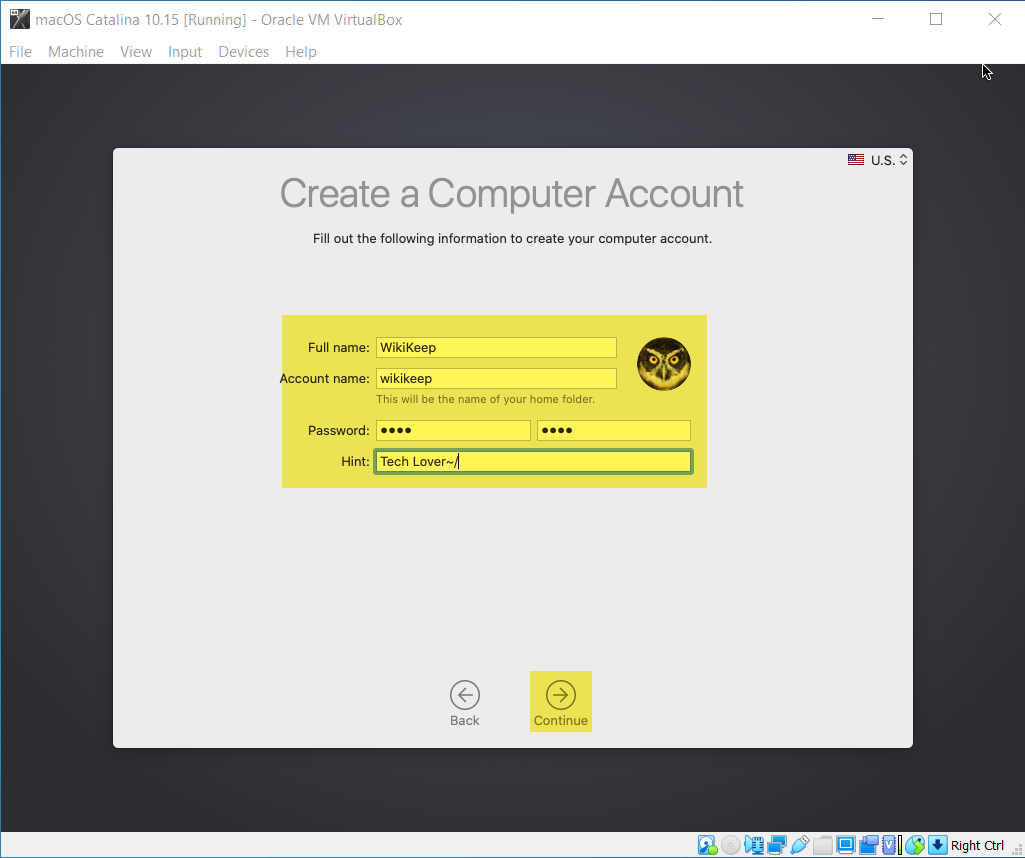
- Create a compute account for yourself on macOS Catalina and click continue.
- On the Express set up simply click continue without any changes.
- Again on the Analytics click continue.
- When you reached Screen time, on-screen time you can customize the settings, once it done click continue.
- Now choose you look for the macOS Catalina use and click continue.
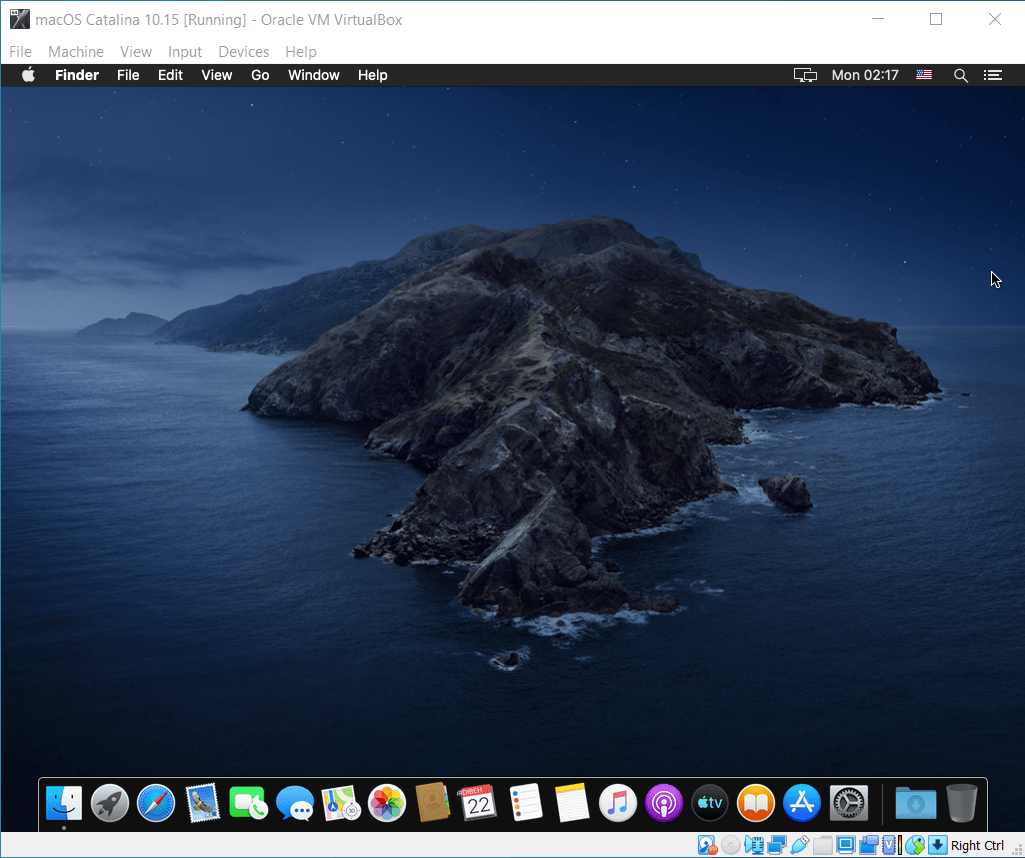
- Wait until it should set up the Mac.
- Finally, macOS Catalina 10.15 successfully installed on VirtualBox on Windows PC. If you were facing the lack of MacBook PC, after this use a virtual machine and install macOS operating system on your Windows PC. You know that the installation was easy, just it needs time.
If you don’t know how to install macOS Mojave 10.14 on VirtualBox or VMware Workstation. So, check out the below articles.
Hello all! I follow the step correctly and after vm boot, it shut down automatically. Never see the installation windows.