Microsoft yesterday launched the latest update of the Windows 11 operating system called Windows 11 Build 220000.120. The previous build of Windows 11 was much clarified than the older ones, as this update of Windows 11 is completely best. Microsoft gets one step forward to make small the right-click button tab smaller than its previous build.
Have you ever, tried to download the ISO image file of Windows 11, or have you tried to update Windows 10 Windows 11 operating system. I think Windows 11 is one of the best and fastest operating systems which required fewer hardware components than Windows 10. Like it requires 4GB of Ram, at least 30GB of hard drive space. But in case, for the better performance of Windows 11 on your laptop or PC, you need to have better hardware components.
Windows 11 is one of the latest operating systems which launched on 6th June 2021 in the market. Firstly, Windows 11 was launched in the leaked version. After that, Microsoft officially confirmed the release date of Windows 11 to people. Windows 11 is completely free of cost to upgrade your PC to it, it doesn’t require you to pay money for it. However, if you are using Windows 10 then simply you can update it to Windows 11 through the Update & Security window.
So, in this article step by step, I will guide you on how to update Windows 11 to the latest version on a laptop. If you don’t know how to update your operating system then you are on the best path to learning how to do it.
How to Update Windows 11 to Latest Version on any Laptop or PC?
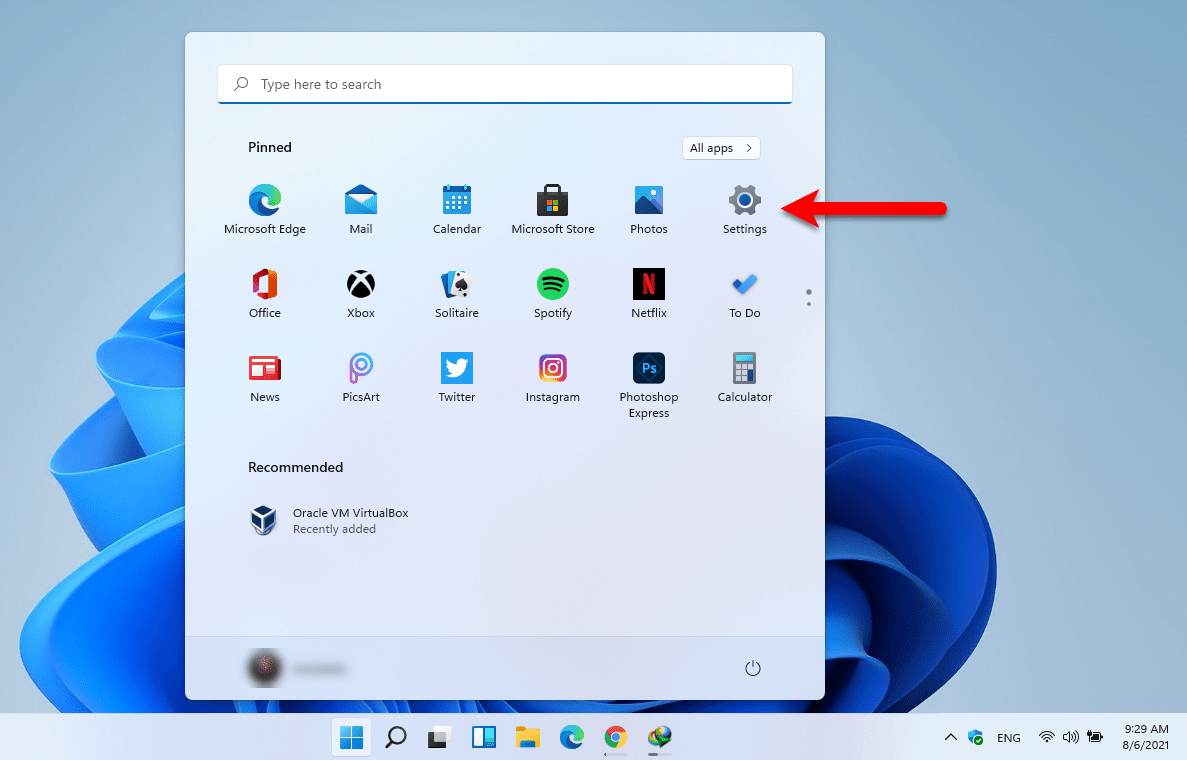
Step 1. To update your Windows 11 to the latest version simply navigate by clicking on Windows 11 start menu. When the start menu opened click on Settings.
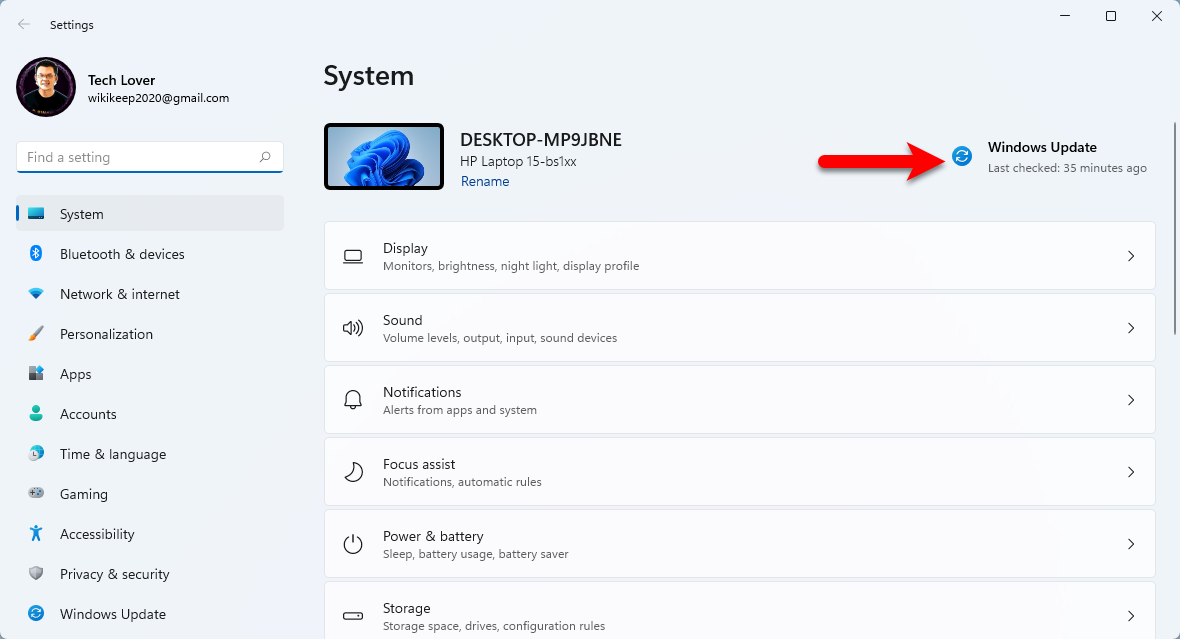
Step 2. When the Windows settings opened click on the “Windows Update” option to check for updates.
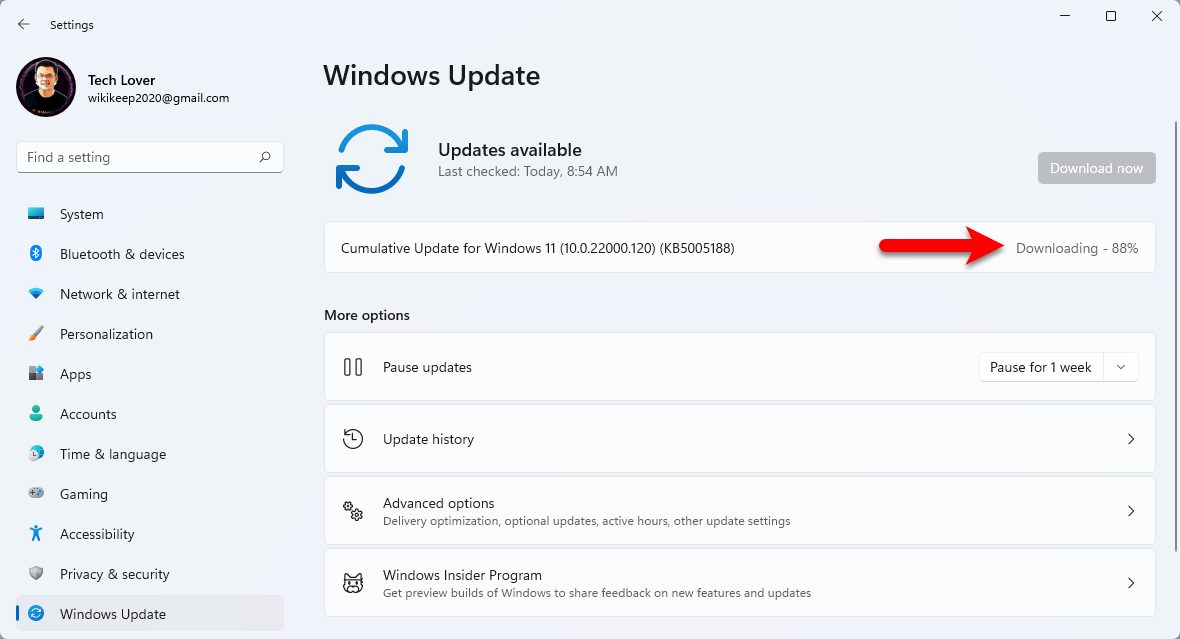
Step 3. When the latest update is available, automatically it will start downloading the update. So, downloading the latest update may take time, wait until it should be completed.
Step 4. Once the update is successfully downloaded it will starts automatically installing the latest update.
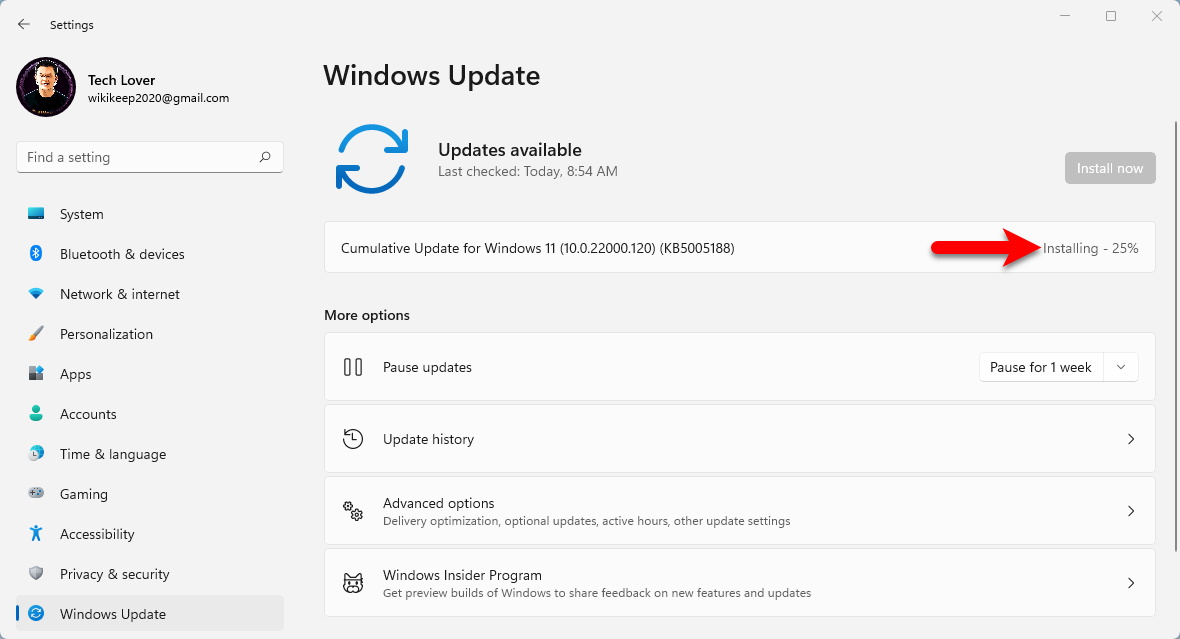
Step 5. When the installation is completed, you will be asked to restart your machine. So, click on the restart now option to complete installing the updates.
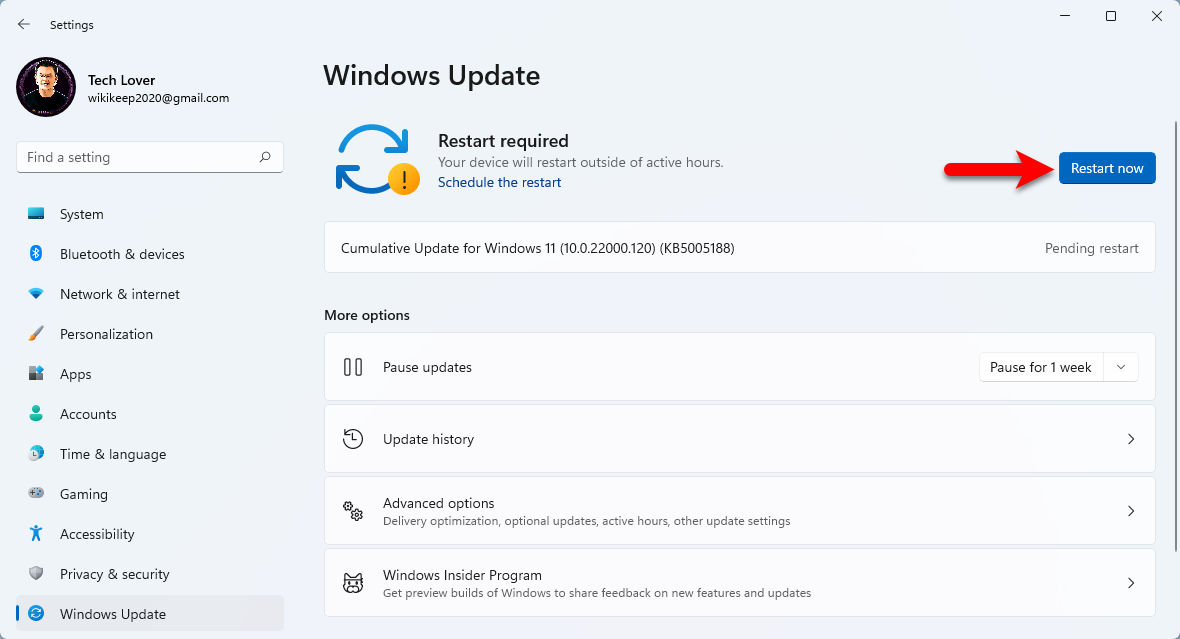
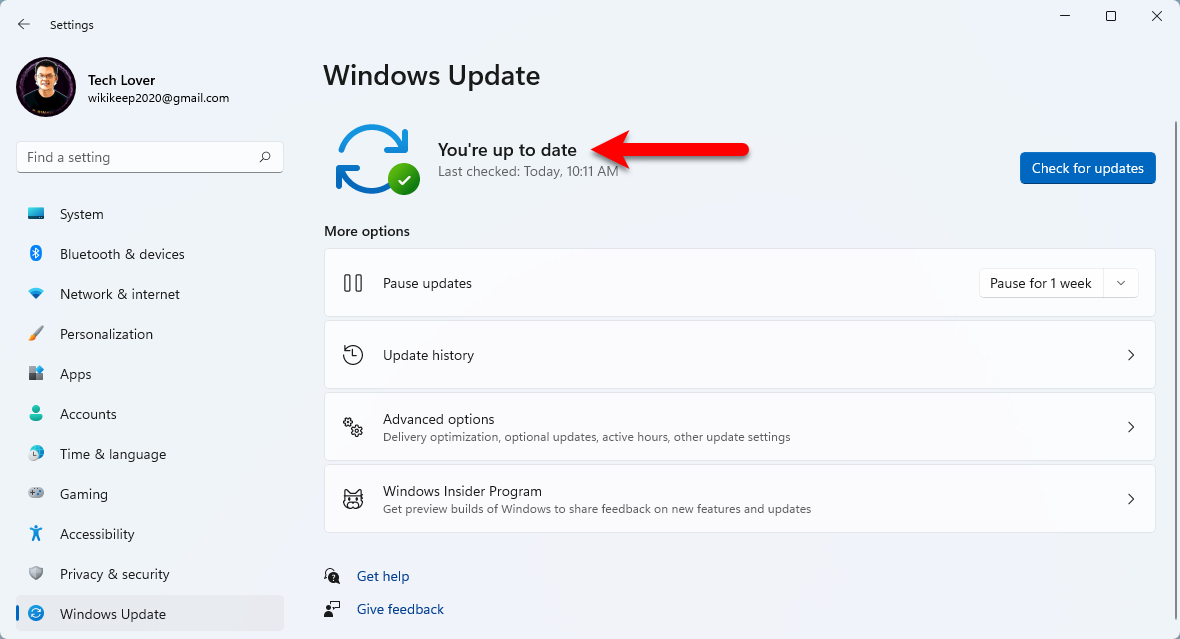
Step 6. Wait for few moments until it should get complete the installation, after coming back to your computer window. Again for checking the update, click on Windows Start Menu>Settings>and click check for updates. There you will see your Windows update status.
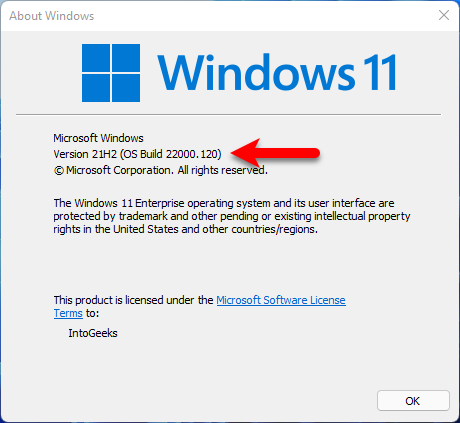
Step 7. For checking your Windows update version, click on the Windows start menu type there “Winver” and press enter to open the Windows update version update window.
Bottom Point
Finally, Windows 11 is successfully updated to the latest version. However, if you faced any kind of problem feels free to share with us via the comment box section. On the other hand, if the article was useful don’t forget to share it with your friends.
