Are you looking for a free screen recorder? Free screen recorder has a long way in these years, now there are some incredible screen recorder for your Windows 10 computer that records your screen that whatever happens there and it record for free. Using the paid screen recorder can be frustrating for us, on the other hand, it requires every month to purchase its license key.
In this post, you will get the idea of the 5 best screen recorder for Windows 10 PC, among those 5 screen recorder the best screen recorder is OBS Studio. Most of the YouTubers, Streamer are currently using OBS Studio which is a more impressive and comfortable screen recorder. OBS Studio with a bunch of handy features and tools in the era of the recorder is best overall, it can not only record your computer screen, on the other hand, but it also has the feature to take footage from your webcam and picture-in-picture mode video. Overall, it has best the best audio recording features that attracted lots of users, the auto noise cancellation feature. It has the ability to save the format of your choice, or the stream via the service of your choice.
However, the OBS Studio is one of the most stable and professional screen recorder for professional gamers, YouTubers, or video editor. Also, there are a bunch of extra options that gives you to complete your screen recorder experience with it. Even if you want to record your computer screen for a minute then the OBS Studio is the best for you.
Through, this post we will cover the best screen recorder for you, whether you are capturing video games, making Tutorials for your YouTube channel, recording let’s play video, or capturing a conference call, then you will find out the best choice of your screen recorder.
- Best Gaming Headsets for macOS Big Sur in 2021
- Top Best Printers for macOS Big Sur in 2021: Best Printer for Mac
Best Screen Recorder for Windows, macOS in 2021
#1 ScreenREC
From best screen recorders the ScreenrREC is the top, screenREC is a neat utility that lets you take screenshots and video recordings from your desktop. You can use the ScreenREC for multi-purpose activities on your computer, on the other hand, the ScreenREC is based on the following operating system such as Windows, Linux, and macOS. Installing the ScreenREC on your computer required around 2GB of capacity, and for better performance, it needs 4GB of RAM memory.
ScreenREC is consists of huge features, for installing the ScreenREC on your Windows, Linux, or macOS computer. Firstly, you need to create a login account, or you can log in with your existing Google account. The account is not for taking screenshots but for sharing the files you need to create an account.
The ScreenREC features are impressive and incredible and the video recording feature can be operated as the image capture. Except the microphone button that can be activated on or off. The microphone device can be activated or deactivated while recording the screen of your computer.
However, the ScreenREC is one of the advanced screen recording tool for your computer, it doesn’t matter whether you are using Windows, Linux, or macOS operating system. It’s a handy tool for recording your computer screen or taking screenshots for your blog post or any other purpose. It allows you to generate a separate link to share file data between your friends with a few clicks.
#2 ShareX
The second world best screen recorder is ShareX, ShareX is an open-source software for taking screenshots video capturing tool. It’s a free tool where you can take screenshots of video recording without any watermark or time limit. But there are features that can’t be control able using the mouse cursor, on the other way, you have to use your computer keyboard for shortcuts. For instance, for recording, you can use the key by tapping the Shift+Print screen, to stop the recording by tapping the Ctrl+Shift+Print Screen you will be able to stop the recording.
The ShareX is built with an advanced and professional features that allows you to take screenshots and save them into the GIF format instead of a video file. The ShareX is extremely useful for sharing on forums on social media. After recording the screen you can simply edit and share it on YouTube, Facebook, or other social media platforms.
Not only the ShareX is one of the best screen recorder, but it can also capture the entire scrolling webpage. It can identify text via OCR, it can record the screen according to a schedule.
As it has the best features ability to share screenshots, recorded video directly with few clicks on the social media platforms. Also, there are a bunch of handy features that you will know after installing it on your computer.
One of the bad features of the ShareX screen recorder is that you can’t record the gameplay screen, while it’s in full-mode. But on the other side, most of the people who are making YoTube tutorials prefer this r
HotKeys
- Ctrl+Print Screen Capture region
- Print Screen Capture the entire screen
- Alt+Print Screen capture active window
- Shift+Print Screen Start/Stop screen recording using custom region
- Ctrl+Shift+Print Screen Start/Stop screen recording (GIF) using custom region.
#3 NVIDIA SHADOWPLAY – NVIDIA SHARE
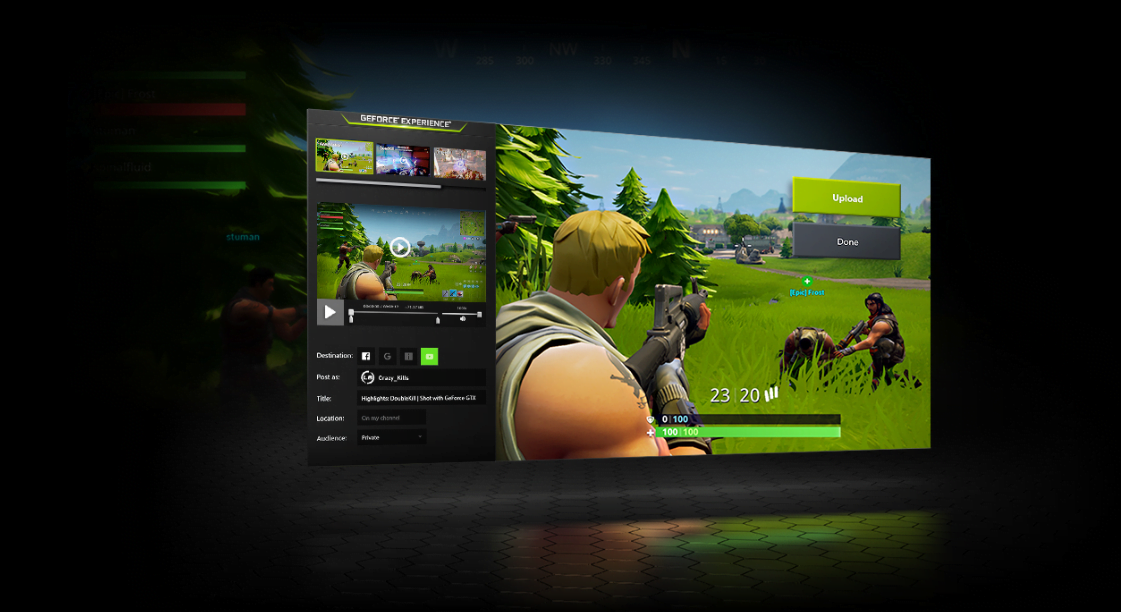
Nvidia Share (formerly ShadowPlay) is a hardware-accelerated screen recording utility for Windows PCs using GeForce GPUs, made by Nvidia Corp as part of its GeForce Experience software. It can be configured to record continuously a time behind, allowing the user to save the video retroactively. Share is supported for any Nvidia GTX 600 series card or higher.
NVIDIA shadowplay which you known as NVIDIA share is almost one of the impressive screen recorder for your computer. On the other hand, it’s a free screen recorder that allows you to record it directly while opening the NVIDIA control panel. Mostly, the NVIDIA share comes with the NVIDIA driver, while installing the NVIDIA graphic card driver it will automatically appear in the list.
Share can use two capture methods: Frame Buffer Capture (NVFBC) and Inband Frame Readback (NVIFR). NVFBC is used in full-screen mode. NVIFR allows you to record the single window instead of recording the whole screen, but the betterment is it doesn’t impact on the performance.
Once the NVIDIA share starts recording, it encodes the dedicated GPU hardware accelerated H.264 that records up to 4K video resolution with minimal impact on your system. The settings are customizable with the range of your system.
NVIDIA Share Features taken from official site NVIDIA
Sharing your gameplay is easy with NVIDIA Share and Twitch broadcasting. With NVIDIA Share, you can save and record videos and screenshots you can share with your friends. Share can even record several minutes of gameplay in the background so you won’t miss any exciting gaming moments. NVIDIA Share also lets you live-stream your gameplay to Twitch.
NVIDIA SHARE MENU
- Launch the game you want to share.
‘On your SHIELD Controller, press and hold the Home button. Your game will pause and bring up the share menu: - Select the Instant Replay option to enable recording of the last 5 minutes of your gameplay.
- Press the Back button again to return to gameplay. Your game is now being recorded.
- Once you are ready to share your gameplay, press and hold the Home button to re-enter the share menu.
- Selecting the Auto Record option this time will open options to either Save, Save and share or Stop your recording.
- You can also use the Record option if you want to record more than just the last five minutes of gameplay.
- To take a screenshot of the action at any time, select the Screenshot option to save a screenshot to your device.
BROADCAST TO TWITCH
- Launch the game you want to broadcast.
- On your controller, press and hold the Home button. Your game will pause and bring up the share menu:
- Select the Broadcast option in the menu to begin streaming to Twitch. If you haven’t already logged in with your Twitch account details, you will be prompted here.
SHARE MENU SETTINGS
- n the top row of the Share menu, the Share settings button allows you to change a number of settings to optimize your sharing experience.
- Twitch settings - Change settings that are specific to Twitch broadcasting.
- Change Quality - Adjusts the video quality of recorded content.
- Instant Replay last - Adjust replay duration to up to 20 minutes of game time.
- Status - Toggle the displayed info on the HUD while recording, which includes microphone ON/OFF status, record icon, video resolution, frame rate, and bit rate.
- Auto record last - The maximum length of the recorded gameplay allowed when auto-recording gameplay.
- Mic volume - Move the slider to adjust mic volume.
- Adjust layout - Customize UI that is displayed on screen when broadcasting.
#4 AMD RELIVE
Comparing the AMD graphic cards and NVIDIA both of them are the best in the era of gaming, also both of the companies have built the best environment for gamers or other daily uses of computers with including the NVIDIA and AMD graphic cards. Mostly, as the above screen recording tool was mentioned in the above description then the same AMD has launched the screen recording tool called AMD Relive.
AMD Relive tool allows you to record your best moments, your entire screen, capture the screen, take snapshots from your entire screen. Also, it’s one of the most easy tools for making tutorials, gaming, and other videos. It allows you to make your videos into the format (GIF) which is one of the most valuable tools in the current era.
- Social media sharing for your gaming
- Capture, view, and share images, videos, or GIFs all from one location
- Easy access to major media and capture features

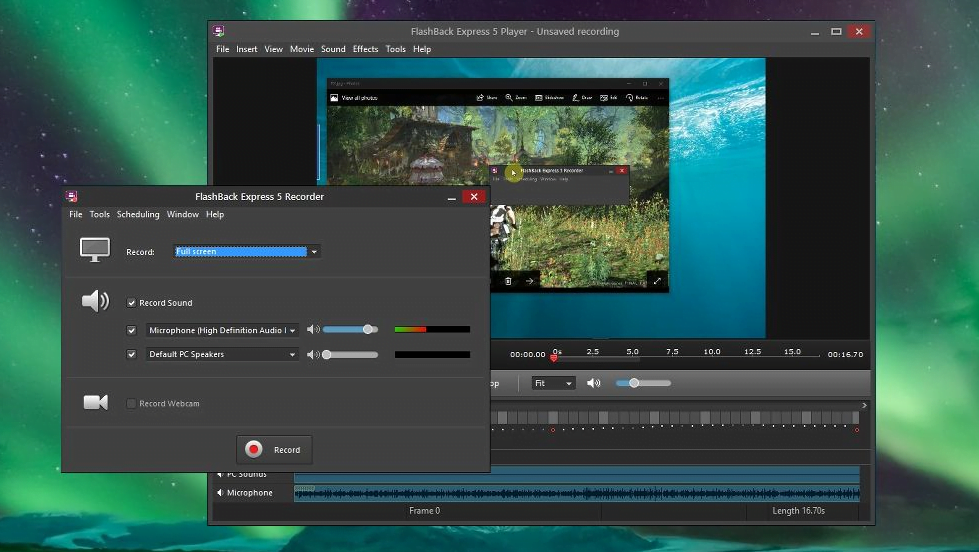
#5 FLASHBACK SCREEN RECORDER
Flashback screen recorder is currently competing with the OBS Studio which currently has the higher name in the world of recording. Getting its paid version won’t be frustrating for you, in case, it removes the ugly watermark from the screen or the time limits. The flashback screen recorder packed with the advanced tools and features that rival most of the programs. Now it hits more than OBS Studio, so if haven’t tried any video screen recorder or using the screen recorder for the first time then I suggest you install the flashback screen recorder on your computer.
Flashback screen recorder allows you to record your entire screen, a window, selected areas, and webcam. Once the screen recorder automatically the screen recorder will close and open the recorded video into a simple video editor window. After that, you can start editing your video, trim, add sound, add logo, once the editing completed you can directly upload it to YouTube or save it to your computer.
The flashback screen recorder is a highly professional screen recorder for your computer, to get into the flashback screen recorder it will take minutes. Its entire look is professionally designed with advanced tools that give your desktop look more attractive. Its features is outstanding it allows you to obscure password entered on screen, replace your silly wallpaper, hide messy desktop icons, and highlight your mouse icon.
There is not any limitation on the screen recording, it able you to record about an hour of video with any watermark. Or accidentally if you should select the time for the screen recorder manually, to stop recording the screen with the limitation that you have chosen for that.
After recording your computer screen, you can export the video with the following formats, WMV, AVI, MP4. Also, there is no need to get a separate video converter or purchase any, just download and install it on your PC.
- Record your screen, webcam, sounds
- Trim footage, make clips
- Enhance recordings with captions, arrows, images
- Add commentary and music
#6 OBS Studio
If you are a professional gamer on YouTube, Twitch then one of the recommended free screen recorder for gamers is OBS Studio. OBS Studio is paid software that unlikely it can record the screen for up to 30 seconds until you should purchase its full license. OBS Studio can be supported by the following operating systems macOS, Windows, Linux. If you don’t purchase its full license then after recording your screen the watermark will appear on the video after exporting. Ignoring the OBS Studio watermark on the videos, it’s an open-source software to use for recording.
OBS Studio is a perfect tool for both streaming on different platforms and recording any video tutorial with no limitations of time and restriction. Using the OBS Studio you can start live streaming on YouTube, Twitch, or save the project, or encode your footage into FLV format and save it on your computer locally.
OBS Studio is running on your computer through your graphic card it will auto-detect the graphic card, because of that it will record the full-screen mode. There are a bunch of screen recorder which record the screen when the screen is in small mode size. OBS Studio settings are customizable, you can set the settings of recording and stopping the recording by managing the hotkeys. It can use the full multi-Core of CPUs to improve the performance and record up to 60FPs (or even higher than 60FPs).
It is Last but not least, OBS Studio is one of the powerful screen recording tools for professional gamers to do their live streaming or record their games.
But there is another screen recorder tool that the WikiKeep team is currently using. And that is preferred by WikiKeep. that is “Camtasia Screen Recorder” If you want its free version you can directly contact us via the comment section or asking its free version. Soon we will get in touch with you with the Camtasia recorder software setup.
Hotkeys
Here you can set hotkeys that do a variety of things. Some examples:
- Start/Stop Streaming/Recording
- Hide/Show Sources
- Switch to a specific Scene
- Push-to-talk/Push-to-mute
- Capture active window for Game Capture
- Start/Stop/Save Replay Buffer
If you are suggesting any other Screen recorder then feel free to share with us via the comment section.
